
You are offline. Saved records are available on this device. External links and uncached photos need internet.
Your personal garden companion
A garden that feels like you.
Get to know your plants, find your next small job and enjoy watching your garden grow.
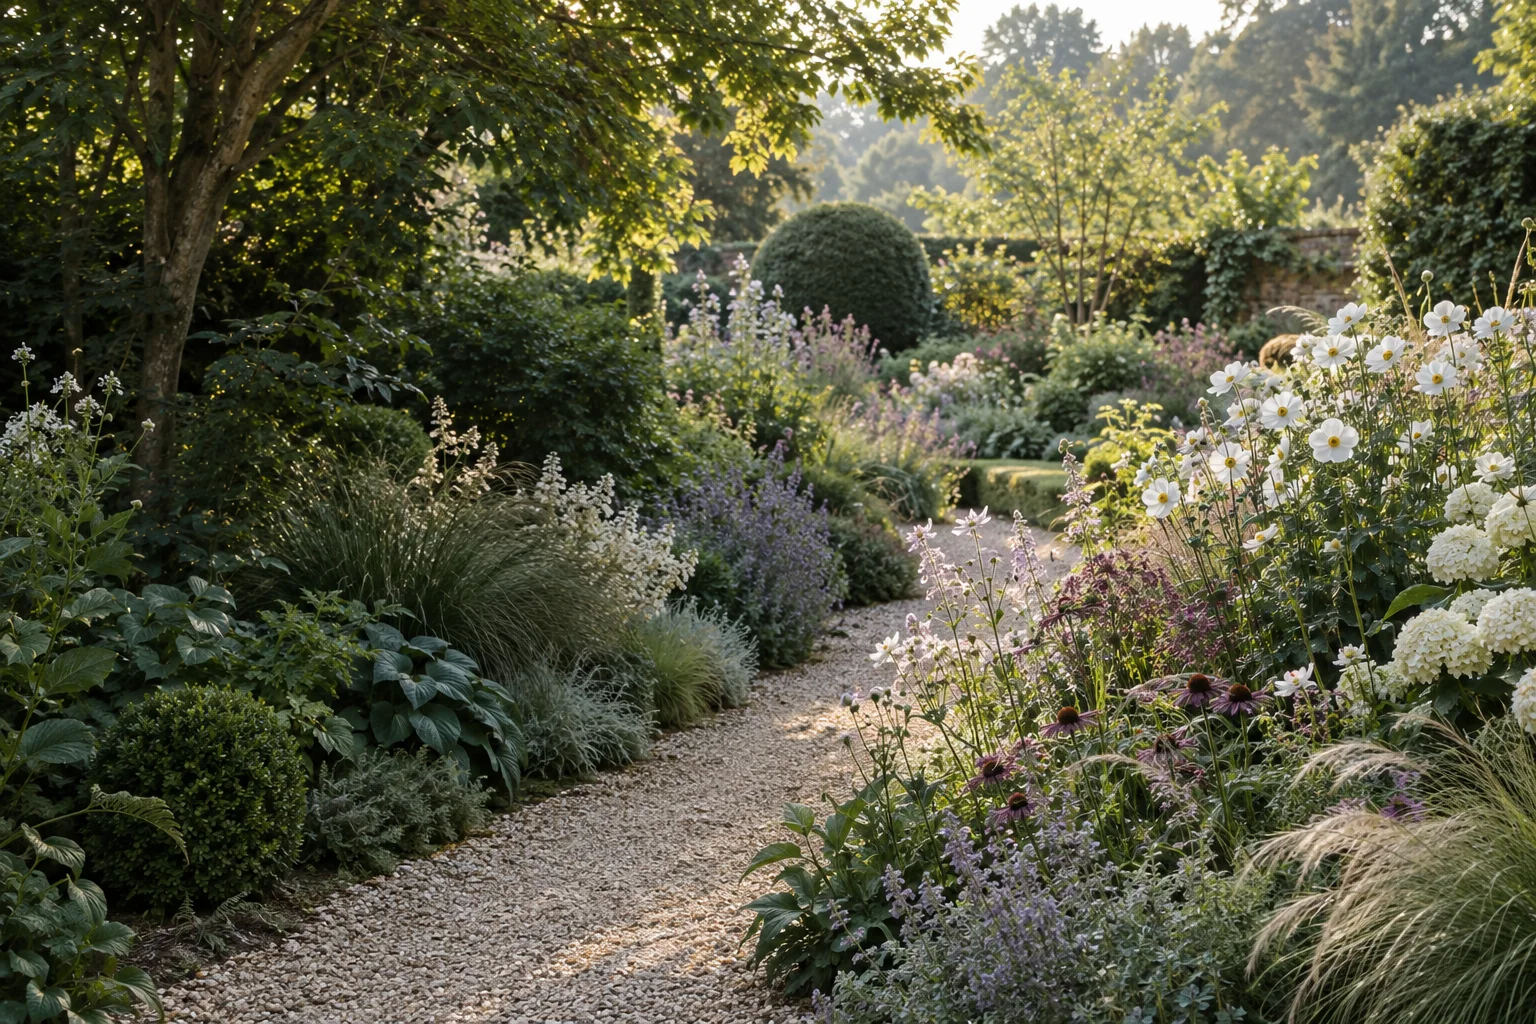
A moment in the garden
My garden today
Your plant library, garden, tasks and notes are saved in this browser. Keep using the same browser and site address to access them.
A place for everything
My garden
Keeping your garden records safe
Your records are saved in this browser. Download a backup before changing device or clearing browser data.
Task calendar
Choose a day to see its tasks or add a new one. Tasks without a date stay in the No date list. Seasonal suggestions appear here only after you add and date them.
Outlined: today · Red edge: overdue · Green: completed entries only
Overdue
No date
Choose Edit task to set an optional date. Open Garden and maintenance tasks for general garden checks and plant care.
Garden details
Areas and features
Areas include borders, patios and vegetable gardens. Features include pergolas, fences and greenhouses. A feature can belong to an area and can also hold plants.
My plants
Your plants, varieties and the places they grow.
A plant can belong to several locations. Choose its locations and save.
Garden tasks
Observation follow-ups
Reminders from your journal. Check this list when you open the app; phone notifications are not sent.
Opening reminders…
Garden and maintenance tasks
Task completion history
Completed garden and maintenance tasks. Observation follow-ups keep their history with the original note.
Garden checks and plant care
Find something to grow
The plant library
Explore by plant type, then find the right fit for your growing space.
Plants
Typical UK planting seasons. Check the plant’s details for dormant bulbs versus potted plants, local frost and soil conditions. This practical group also includes rhizomes and tuberous roots.
Filters compare reported data, not confirmed suitability. Water need is a broad moisture guide, not a watering schedule. RHS ratings do not guarantee survival in wet soil, exposed sites or containers. Flowering months are reference windows and vary locally.
Choose plants for the water or for moist soil beside it. Depth notes describe water cover, not the depth of a planting hole; check whether a figure is measured above the basket, above the crown or as total water depth. Where the source does not specify this, confirm it with the supplier.
Your garden, over time
Garden notes
Save observations and photographs. Each entry gets its own date and stays in your journal.
Saved observations
Saved in this browser at this site address, including photos. This is not cloud storage. Download a journal copy regularly; it opens as a readable HTML file.
Observe · understand · try
Learn about your garden
Start by getting to know your own garden, or find practical help with a job you want to do.
Observe and understand
Get to know your garden
Explore your wishes, meet your plants and understand the light and soil in your own growing places.
Care with confidence
Your everyday gardening
Learn practical jobs, decide what needs attention and find a routine that fits your garden and your life.
Practical guides for planting, watering and everyday care.
Imagine and try
Plan your garden
Bring your wishes and observations into a plan, from the way you use the garden to one small perennial border.
Choose what helps you today. These are subjects to explore, not levels to complete.
Learn at your own pace
Get to know your garden
Start with what is already here. These five guides help you understand your own garden before deciding what to do.
New to gardening? Start here
Meet your garden
Let’s take a first look around together. Notice what is already here, what you enjoy and what you would like to understand — without needing to change anything yet.
Bring your curiosity. A photograph and a few words are enough.
Next, explore your wishes
What would you like from your garden?
Think about the moments you would enjoy here, the practical things your garden needs to do and the kind of care that suits your life.
Choose a direction, without needing a finished plan.
Get acquainted with a plant
Get to know a plant
Look at leaves, stems, buds and roots, and make sense of the words on plant labels. Start with one plant you can return to.
No plant names or prior knowledge needed.
Understand one growing place
Sun, shade and shelter
Follow the light, notice the shade and compare sheltered and breezy spots. Keep a record you can return to as the seasons change.
Start with one place. You don’t need all the answers today.
Understand what is beneath your feet
Meet your soil
Feel your soil, follow the water and learn what pH can tell you. Understand soil, compost, mulch and fertiliser before deciding what your growing place needs.
Start with one small observation. There is no need to change everything.
Learn at your own pace
Your everyday gardening
Practical help for looking after the garden you have. Choose a job below. Start with what you can observe, follow the practical steps and return to see what changed.
Not sure what needs doing?
What needs attention—and what can wait?
Look closely, check the growing conditions and decide whether to act, investigate or watch. Learn what to compare when you return.
Practical guides for a particular job
Find help with something you want to do now.
More mentoring guides being developed
Guide planned
Your first gardening jobs
Learn the everyday basics, from easing a plant out of its pot to planting it and checking whether it needs water.
This guide is not available yet.
Guide planned
Build your own routine
Create a small observation and care routine that suits your plants, the season and the time you want to spend here.
This guide is not available yet.
Everyday gardening · Decide what needs doing
What needs attention—and what can wait?
You notice a yellow leaf, a drooping stem or something nibbling a plant. Before reaching for the watering can or secateurs, take a closer look.
You do not need to recognise every problem immediately. Start by finding out what has changed, how much of the plant is affected and whether it is getting worse. Those observations help you choose a useful next step.
Start with the whole plant
Stand back before inspecting the damaged leaf. Is most of the plant growing as you would expect? Look at the youngest growth, the older leaves and the stems. Then gently look beneath a few leaves.
Notice whether the change affects one leaf, one shoot or the whole plant. Compare with nearby plants, especially others of the same kind. Think about when you first noticed it and whether it has spread.
Why? A yellow leaf is a symptom, not a diagnosis. Normal leaf ageing, water problems and several other causes can produce yellowing; its position and the plant’s overall condition provide better clues.
Check what has happened around it
Has the plant recently been planted, moved, cut back or fed? Has there been strong wind, frost, prolonged rain or drying weather? Note what actually happened rather than choosing a cause yet.
Feel the soil or compost below the surface where you can do so gently without damaging roots. Around a new planting, check the original root ball—the roots and compost that came out of the pot—as well as the surrounding soil. They may hold different amounts of moisture.
Why? A damp surface does not guarantee moist roots. Equally, a wilting plant in persistently wet soil may have a root problem; adding more water can make matters worse.
Choose how soon to respond
Use what you found to decide which of these situations fits. The examples are starting points, not diagnoses for every plant.
- Act now when the need is clear. A newly planted perennial is wilting and its root ball is dry: water it carefully, allowing the water to soak into the root area. Check that it has reached the roots rather than simply wetting the surface.
- Investigate promptly when the plant is declining. Several shoots are collapsing, damage is spreading quickly or the plant remains wilted despite suitably moist soil. Continue the basic checks today and seek plant-specific advice if they do not explain the problem.
- Watch when the change is limited and the plant is otherwise well. A few older leaves are yellowing while the rest looks healthy. Check whether this matches the plant’s normal seasonal behaviour, take a photograph and look again for any spread.
Why? Prompt care can prevent avoidable damage, while an observation gives you a useful comparison when treatment is not yet justified. Watching means returning to check.
Decide whether feeding damage matters
A few holes in an established plant are different from a seedling losing most of its leaves. Look for fresh damage and check how much healthy growth remains. If damage is increasing, try to identify what is causing it before choosing protection.
Finding an insect does not automatically mean you have found the culprit. Ladybird and hoverfly larvae, for example, can feed on aphids. Some aphids can be tolerated while their predators become more numerous.
Why? Removing every insect can also remove useful garden wildlife. Judge the effect on the plant and use a suitable, targeted response when one is needed.
Pause before cutting back or removing a plant
If a shrub looks untidy, first find out what it is and what you want pruning to achieve. Check its pruning guidance: cutting at the wrong time can remove shoots that would have carried flowers.
Before digging out a plant with no visible growth, check whether it normally dies back for winter and when it usually reappears. Keep its position labelled while you find out. A plant that is visibly deteriorating during its growing season needs a different assessment.
Why? Cutting and removal are difficult to undo. Knowing the plant helps you distinguish seasonal change from a problem.
Choose an action that answers what you found
If the roots are dry, address watering. If excess water is trapped in an ordinary plant container, check its drainage. If you have not found a cause, record what you know and look for advice specific to that plant and those symptoms.
Avoid feeding, pruning and moving a struggling plant all at once. Fertiliser does not correct every cause of poor growth.
Why? A clear reason helps you choose an appropriate action and assess its effect. You can deal with several confirmed problems when necessary without trying unrelated remedies.
Decide what to look for next time
Take a photograph of the whole plant and a close-up of the affected part. Record the date, conditions, what you checked and anything you did. If you ask for help, include the plant’s name if known and how long the change has been happening.
Choose a return time that fits the situation. A wilted container plant you have watered needs another look later that day; a small, stable leaf change might be checked over the following few days. Look sooner if it worsens.
Compare fresh damage, the condition of new growth and whether wilting continues. Already damaged leaves may remain marked even after the cause has been addressed.
Why? Knowing what you are checking makes a follow-up useful. Improvement may mean the damage has stopped spreading, rather than every old leaf looking perfect again.
Record what you found
Keep the observation with the relevant growing area. You can select a plant and add photographs in the journal editor.
Edit the prompts, then press Save. Opening a draft does not save it or create a reminder.
Choose the job that helps
Once you know what needs doing, use the practical guides for the steps. You can leave other jobs for another visit.
Sources and further reading
- RHS: Leaf yellowing and its possible causes
- RHS: Checking and watering plants
- RHS: Establishment problems in trees and shrubs
- RHS: Aphids and their natural predators
- RHS: Assessing and managing slug and snail damage
- RHS: Different plants need different pruning approaches
- RHS: Seasonal growth of perennials
Sources checked 21 October 2026. Use the observations to guide your next step; similar symptoms can have different causes.
Learn at your own pace
Plan your garden
Turn your wishes into ideas you can try. You can think about the whole garden or begin with one small planting area.
Start with the whole garden
Plan your garden
Map what is already there, arrange the main areas and test paths, seating and views before choosing the planting.
A practical guide with a place to save your decisions and a photograph of your sketch.
Flowers, foliage and the setting
Colour in your garden
Compare colour combinations, balance strong accents and plan for the months between flowers. Includes three illustrated palettes.
Flowers, foliage, berries and winter interest
Colour through the seasons
Plan changing displays with flowering overlap, autumn leaves, berries and the shapes that remain in winter.
Size, spread and spacing
Give plants room to grow
Read mature plant sizes, measure centre-to-centre spacing and allow a new border to fill out gradually.
Make a border feel connected
Shape, layers and repetition
Combine plant outlines, leaf textures and heights, then repeat selected plants to connect the planting.
From measurements to a shopping list
How many plants do I need?
Use plant spacing to estimate quantities, check a mixed-border layout and make a practical shopping list.
Choose care you can manage
Plan for the care you want to give
Check watering, supports, division and winter protection before buying, and separate establishment care from longer-term jobs.
Try the plan on the ground
Try the layout before planting
Mark the border edge, test plant positions and check mature sizes, views and access before digging planting holes.
Learn from the planting
Let the garden develop
Understand how a young border changes, recognise when a plant needs attention and adjust your plan using what you observe.
Put your observations into practice
Your first border
Get to know one growing area, choose plants thoughtfully, and make a small perennial border of your own. Learn by trying things in your garden.
Go at your own pace. No scores, deadlines or required order.
Getting to know your garden · Start here
Meet your garden
Before we decide what to do with your garden, let’s spend a little time getting to know it.
You don’t need to know any plant names, own special tools or have a plan. Bring your curiosity and, if you like, your phone for a few photographs. We’re going to look at what is already here, notice a few differences and find one or two things you would like to understand better.
There is nothing to put right on this first visit. You can do the whole walk, or stop after one small area and come back another day. A balcony or a few containers are just as good a place to begin.
Already had a look? Record what you noticed ↓First, pause
Take in the whole space
Start somewhere you naturally see the garden: the back door, a window, the gate or your usual seat. Put the idea of “jobs that need doing” to one side for a moment. What catches your eye first?
Let your eyes travel around the space. Notice the broad shapes: an open patch of lawn, a tree, a line of pots, a fence, a path or a densely planted corner. You are getting your bearings, not making an inventory of everything.
If the garden feels overwhelming, choose just the part you can see from where you are standing. We can come back to the rest later.
Now, wander a little
Notice the different places within it
Walk slowly along the usual route through your garden. Stop whenever the space seems to change. Perhaps you move from sunshine into shade, from an open area to a spot enclosed by a wall, or from paving onto soil.
Look at the ground as well as the plants. Does it slope? Is one place lower than the rest? Can you see a puddle, a worn route through the grass or a place people always walk around? For now, simply notice these things. We’ll explore light, shelter, soil and water properly in later guides.
You don’t need to divide the garden perfectly. Give two or three places names you would actually use: “by the kitchen door”, “under the tree” or “the pots near the steps”. These can become areas in My garden when you are ready.
Look a little closer
Get acquainted with what is already here
Pick one plant that interests you. Look at its overall shape before examining a leaf, a stem or a flower. Is it upright, spreading or growing low across the ground? Are the leaves broad, narrow, shiny, soft-looking or divided into smaller pieces?
If you don’t know its name, use a description and a location: “the plant with large round leaves beside the bench”. Take a photograph if you want to recognise it again. You can learn its name later; an uncertain guess doesn’t need to become a fact in your notes.
Look for things you might want to keep: a plant you enjoy, a useful path, a comfortable seat or a view through the planting. An inherited garden may already contain things you will come to value.
For example, “this plant has several yellow leaves” is an observation. “It needs feeding” is a possible explanation, which would need checking. You don’t have to decide on a treatment during this walk.
Your experience matters too
Notice how you feel in the space
Where do you naturally stop? Is there a view you enjoy, a sound you notice or a place where you feel comfortable? Look for something you like, even if it is only one small detail.
Then notice anything that makes the garden harder to use. Try to describe the experience instead of immediately choosing a solution. “I can’t comfortably reach the back of this bed” tells us more than “this bed is wrong”. “I’d like somewhere pleasant to sit” leaves room to explore several possibilities.
You may feel uncertain, disappointed or excited about what you have. There is no correct reaction, and you don’t have to turn every concern into a project today.
Make it easy to look again
Take a photograph that tells you something
A useful first photograph doesn’t have to be beautiful. Take a wider view that shows where things are in relation to one another. If one plant or detail interests you, take a closer photograph as well.
Choose a viewpoint you can find again: beside the back door, for example. A little of the fence, path or building in the frame will help you recognise the same position later. Write down where you stood.
When you save an observation below, you can attach up to four photos. The journal adds the date automatically. You can also make a note without any photographs.
Keep just what is useful
Your first observations
You don’t need to write a report. A few lines are enough to give your next visit a starting point. The button below opens your Garden notes editor with a few prompts. Use the ones that help, delete the rest and add photos if you wish.
“By the back door. I like the view towards the tree. The narrow path is awkward to use. There’s a low plant with round leaves that I’d like to identify. Next time, I’ll look at this corner later in the day. Photo taken from the kitchen step.”
Choose an existing area, or use Whole garden for your first look around. You don’t need to create areas before starting.
Save the observation in the editor to keep it. Your notes and photos stay in this browser and are included in your full garden backup.
That’s enough for a first visit
You have given yourself something more useful than a list of jobs: a starting picture of your own garden. You may have noticed things you would like to keep, places that differ from one another and questions you want to explore.
On another visit, choose one of those questions and look again. You do not need to repeat the whole walk or finish anything on a schedule.
When you feel ready, explore what you would like from your garden. We’ll use what you noticed to begin finding your own direction.
Getting to know your garden · Your wishes
What would you like from your garden?
You’ve started looking at what is here. Now let’s think about what you would like this place to bring to your life.
You don’t need a favourite garden style or a list of plants. We can start with much simpler things: somewhere to sit, something you enjoy looking at, space to grow food or a place to spend time with other people.
If you made notes during Meet your garden, keep them in mind. The things you enjoyed and the places that felt awkward are useful clues. If you haven’t taken that walk yet, you can still explore your wishes here and look around afterwards.
Ready to put your thoughts into words? ↓Begin with something familiar
Picture an ordinary moment
Imagine being in your garden on an ordinary day, rather than on a special occasion when everything is tidy. What would you like to be doing?
Perhaps you are sitting with a cup of tea, picking a few herbs for dinner, watching birds from the kitchen or talking with friends while children play nearby. You might simply want a view that makes you smile when you open the curtains.
Choose a moment that feels like your life. A garden doesn’t need to entertain guests, feed a family and look impressive all at once. It can do one or two things that matter to you.
Notice your own preferences
Find out what you are drawn to
Think about a garden or outdoor place where you have felt happy. It could be a relative’s garden, a public park, a place you visited or a small corner you already have. What did you enjoy about being there?
Try to look beyond the word “beautiful”. Was it the feeling of enclosure, the colours, the scent, the movement of leaves or the pleasure of finding something new each time? Perhaps it was informal and full of life, or open and easy to move around.
If you collect inspiration pictures, add a sentence beside each one explaining what you like. You can borrow an idea without needing to recreate the whole photograph. Its plants and layout may belong to very different conditions.
Think about how the space is used
Make room for real life
Who else uses this garden? Ask them about something they enjoy or would like to be able to do. A shared garden can hold different wishes; they don’t all have to be expressed in every part of it.
Walk through a normal day in your mind. Where do you carry shopping, move bins, dry clothes, store tools or get to the shed? Does anyone need a clear, comfortable route or somewhere to sit along the way? Include children’s play and pets if they are part of your household.
These everyday needs deserve a place in the plan. A photograph of an attractive border won’t tell you whether you can still get a wheelbarrow past it or reach a washing line.
Be kind to your future self
Choose a garden you want to care for
How do you feel about spending time looking after plants? You might enjoy regular pottering, prefer occasional sessions or want the garden to ask relatively little of you. Any of these is a reasonable starting point.
Think about your usual week, including busy periods and holidays, rather than the most enthusiastic version of yourself. Consider the work itself too. Growing food may appeal to you, while frequent watering does not. You might enjoy learning to prune but dislike mowing.
You don’t need to predict exact hours or know every gardening task yet. Simply record what you are willing to try, what you would rather avoid and anything that makes a task difficult. We can use those preferences when considering plants and ways of growing them.
“Less maintenance” is a useful aim, but it helps to say which work you want less of. That gives us something practical to consider.
Give yourself a starting point
Decide what matters first
Look at the wishes you have collected. Which one would make the biggest difference to your enjoyment of the garden? You don’t have to abandon the others. We are choosing a starting point, not making a permanent decision.
Separate what you need from what would be nice. For example, a comfortable route to the door might come before a new planting scheme. A favourite existing plant might stay while you experiment elsewhere.
It also helps to decide what you are comfortable spending or changing at this stage. You can begin by observing, rearranging what you already have or trying one small area. There is no need to turn a wish into a shopping list today.
If two wishes pull in different directions, write both down. “I want lots of pots, but I don’t want frequent watering” is a useful question for the planning stage. We can examine the trade-off instead of pretending it doesn’t exist.
Make it your own
Keep your garden wishes
Put your thoughts into a few ordinary sentences. This is a working note that you can revisit, not a promise to complete a project. The prompts in the editor are there to help; delete any that don’t feel useful.
“I’d like somewhere comfortable to sit after work, with interesting leaves and a few flowers nearby. I want to keep the old rose and the route to the shed. I’m happy to potter at weekends, but I don’t want lots of pots to water. First, I’ll look for a suitable sitting place. A vegetable patch can wait.”
Choose Whole garden if you are thinking broadly. You can make a separate note for a particular area later.
Save in the editor to keep your note in Garden notes. You can edit it later or add a new reflection as your ideas change. Existing garden goals are not overwritten.
You now have a direction to explore
You don’t need to know which plants to buy yet. Your wishes will help you judge possibilities as you learn more about plants and your growing conditions.
On your next look around, hold your first priority in mind. Does one part of the garden seem promising? What would you need to understand before deciding? Keep the question open if you don’t know yet.
When you are ready, get acquainted with one plant and the everyday gardening words you will come across. You can also leave your thoughts to settle and return another day.
Getting to know your garden · Meet a plant
Get to know a plant
Let’s get acquainted with one plant, rather than try to learn a whole garden’s worth of names.
Choose something you can look at easily: a plant beside a path, a shrub near the door or a plant in a pot. You don’t need to know its name. A description such as “the small plant beside the steps” is enough for this visit.
We’ll look at how it is put together, then make sense of a few words you will see on labels. You don’t need to memorise them. The aim is to feel more comfortable looking at a plant and understanding the advice that comes with it.
Start with your plant ↓Start with what you can see
Look at the whole plant first
Stand back a little. Is your plant upright, rounded, spreading sideways or growing close to the ground? Does it have one main stem or several? Where does it seem to begin at ground level?
Now move closer and follow one stem with your eyes. Look for the places where leaves or smaller branches join it. If several plants are growing together, it may take a moment to work out which leaves belong to the one you chose. That is a useful observation in itself.
Follow one stem
Find a leaf, a stem and a bud
Leaves are the main places where most familiar garden plants use light to make sugars. Look at their shape and how they sit on the plant. Are they broad or narrow? Is each leaf a single blade or divided into smaller leaflets? For now, describing what you see is enough.
Stems support the leaves and flowers and carry materials between different parts of the plant. Some are soft and green; older woody stems are firmer and may have bark. A leaf’s little stalk connects it to the stem — it is not necessarily a separate branch.
Buds are undeveloped shoots or flowers. Look near a stem tip or where a leaf meets the stem. A bud may be tiny, tightly closed or starting to open. Not every bud will become a flower, and it can be difficult to tell what it will do just by looking.
When an instruction later says “cut above a bud”, the word will refer to something you have already looked for. We are only locating it today, not deciding to prune.
Remember the part you cannot see
What is happening below ground?
Roots anchor a plant and take up water and mineral nutrients; they can also store reserves. You don’t need to dig up your plant to understand that its roots are part of what you are caring for.
If you later remove a plant from its pot for planting, the roots and the compost held around them form the root ball. That is what planting instructions mean when they ask you to water or support the root ball.
For today, simply find where the stems meet the ground or potting compost. In many border perennials, you will hear this growing area near the base called the crown. You don’t need to uncover it or pull the stems apart.
Make sense of the label
Annual, perennial or shrub?
These words help describe how a plant lives and grows. They are useful clues, but they are not separate boxes that never overlap.
- Annual
- A plant that completes its life cycle, from germination to producing seed and dying, within a year. If seedlings appear next year, they are new plants rather than the original plant returning.
- Biennial
- A plant that usually grows leaves in its first growing season, then flowers, produces seed and dies in its second. You may come across this word alongside annuals.
- Perennial
- A plant that lives for more than two years. This does not promise that every perennial will survive every garden’s winter conditions.
- Herbaceous perennial
- A perennial without a permanent woody framework. Many familiar border perennials lose their above-ground growth in autumn or winter and grow again from surviving parts in spring; some retain foliage.
- Shrub
- A woody plant, commonly with several stems branching near its base. A shrub is also perennial: “shrub” describes its growth form, while “perennial” describes its lifespan.
In a garden centre, “perennials” often means the herbaceous plants sold for borders, even though trees and shrubs are perennial too. That everyday use of the word can be confusing at first.
Think beyond today
Evergreen and deciduous describe the leaves
Evergreen plants keep foliage through the year, although individual leaves are replaced. Deciduous plants shed their leaves seasonally. These words tell you about foliage, not whether a plant is an annual or a perennial. A shrub, for example, may be evergreen or deciduous.
A bare branch or an empty-looking patch in winter is not enough evidence on its own to declare a plant dead. Find out what that particular plant normally does before removing it. Likewise, the word “evergreen” does not guarantee that a plant is hardy where you live.
This becomes useful when planning a border: a summer photograph shows only one part of its year. You can enjoy seasonal change while also thinking about what you want to see when flowers or leaves are absent.
Use a few words, not the whole dictionary
Read one label with your own plant in mind
If you have the label, look for its name, plant type and eventual height and spread. The name is your starting point for finding the right care information; size helps you think beyond the plant’s current pot.
You may see a common name, a botanical name and a variety or cultivar name. Keep the whole name when recording it, including the variety if given, so you can look up the same plant again. A photograph of the label can be easier than copying unfamiliar spelling.
On a plant page in this app, open Overview, Suitable location and About & sources. Notice which details are recorded and which are still unknown. You do not need to make a planting decision yet.
Keep something you can return to
Your plant observation
A few sentences and a photograph are enough. Record where the plant is, something you noticed and a question you would like to follow up. You can use a description if its name is still unknown.
“The plant beside the steps has several firm, woody stems and small oval leaves. There are little buds near the leaf stalks. I photographed the tip of one branch so I can look again. I don’t know yet whether it keeps its leaves in winter.”
You can add photos and select an existing plant in the journal editor. Save the observation to keep it with its date. No identification is required.
Sources and further reading
These explanations introduce everyday gardening terms. You can explore the detail when it becomes useful.
- RHS gardening glossary
- RHS: growing perennials
- RHS: growing shrubs
- Oregon State University: vegetative plant parts
Sources checked 18 October 2026.
You have a plant to get to know
You don’t need to remember every term. The useful part is recognising a little more of what you see, and having one plant you can look at again.
Next, explore how different places in your garden feel, and what that can mean for the plants growing there.
Getting to know your garden · Light and shelter
Sun, shade and shelter
Let’s find out how one small part of your garden changes through the day.
You might already think of your garden as sunny or shady. But the place beside the kitchen door may be quite different from the far end of a border. A fence, a tree or the house itself can change what a plant experiences just a few steps away.
For now, you don’t need to decide what to plant or change anything. We’ll look, make a small record and leave room for things we haven’t seen yet. You can begin with one visit and come back when it suits you.
Choose a place to look ↓Start with one particular place
Choose somewhere you might like to grow something: a small section of border, a pot beside the steps or the space near a fence. Give it a simple description so you can find exactly the same spot again.
Look at the space the plant would actually occupy. A sunny path beside a shaded bed doesn’t make the bed sunny. A tall plant may reach light that a smaller plant below it never receives.
Watch where the sunshine reaches
On a reasonably sunny day, look at your spot in the morning, around midday and later in the afternoon. Is sunlight falling directly on it, or is something blocking the sun? A place can feel bright because it has plenty of open sky without receiving direct sunshine.
Record the time and what you see. If a cloud passes overhead, wait a moment if you can: cloud cover and shade from a building tell you different things. On an overcast day, simply record that you couldn’t judge the direct sunshine.
Three visits give you useful clues, but they don’t prove how many hours of sunshine the spot receives. If that matters for a plant you are considering, look more often, especially around the times the sun appears or disappears.
“10 am: shaded by the house. 1 pm: direct sunshine. 4 pm: shaded by the fence. I haven’t seen when the sunshine starts or finishes.”
Make sense of the words on a plant label
These terms are helpful shortcuts, rather than a perfect description of every garden. As a UK reference, the RHS describes full sun as more than six hours of direct sunshine a day at midsummer, and partial shade as three to six hours. Other sources may use slightly different boundaries.
- Full sun
- A place with a long period of direct sunshine. Think about the growing season, rather than judging it from a winter visit.
- Partial shade
- A place that receives direct sunshine for part of the day. Note when: midday light is stronger than early or late sunshine.
- Dappled shade
- Patches of sunlight move through an open tree canopy. This differs from the steady shadow cast by a building.
- Shade
- Look more closely: is there plenty of open sky, or is the place enclosed and quite dark? “Shady” alone leaves a lot unsaid.
You don’t have to choose the perfect label today. “Morning sun, shaded later; still checking” is more useful than a confident guess.
Leave room for the seasons
Your notes describe the day you made them. The sun’s path changes through the year, and a tree that lets light through bare branches may cast much more shade once its leaves open. Keep the date with your observations and revisit when the season changes.
A compass direction can offer a clue, but it won’t show you the shadow from your neighbour’s house. Your observations of the actual spot are worth keeping alongside any direction you record.
Notice where the wind reaches
On an ordinary breezy day, compare your chosen spot with another part of the garden. Watch the movement of leaves and stems, and notice where you feel the breeze. You don’t need to go outside in a storm to learn something useful.
Is the spot open to the wind, or does a nearby structure seem to offer shelter? A narrow gap can channel wind, so being surrounded by buildings doesn’t always mean a place is sheltered. Compare places on the same visit, and record the weather rather than assuming one calm day tells the whole story.
This is enough for now. You are learning about the place, not committing to a new fence, hedge or planting plan.
What does this mean for your plants?
Light is one part of a growing place. Shade does not automatically mean damp soil: roots under trees and shelter from rainfall beside walls can make some shaded places dry. We’ll investigate soil and water in the next guide, rather than decide from appearance alone.
Plant descriptions usually point towards conditions in which a plant is likely to do well. They are not always a simple pass-or-fail test. Some sun-loving plants can survive in partial shade but flower less. Tolerance varies, so check the particular plant rather than assuming every plant will adapt.
If something is already growing here, notice how it looks through the season before deciding to move it. If you are choosing a new plant, use your observations to look for a good match. You can enjoy experimenting while being honest about what is uncertain.
Keep a small record of this place
Choose the growing area if you have already added it to My garden, or use Whole garden and describe the spot. The prompts are yours to edit. Leave anything you haven’t observed as “not sure yet”.
Add photographs in the journal editor, then save to keep your dated observation. These notes do not automatically change your growing area’s settings.
You have something better than a guess
You may still have questions, and that’s fine. You now have a particular place to return to and a way to describe what happens there.
Next, look at what is under your feet, how water moves through the area and what you can learn before trying to improve it.
Sources and further reading
The practical observation prompts are written for this guide. For more detail on light categories and local growing conditions:
Checked 18 October 2026. Light categories are guides; individual plants and gardens vary.
Getting to know your garden · Beneath your feet
Meet your soil
Before buying anything to improve your soil, let’s get acquainted with what is already there.
Return to the place you watched in Sun, shade and shelter. This time, look down. What happens here after rain? What does the soil feel like? Does it behave differently from the ground a few steps away?
You don’t need to name your soil perfectly or turn it into something else. The aim is to understand what you can work with, what needs a closer look and which plants might feel at home here. Start with a small observation; you can leave the pH test for another day.
Only growing in pots? The words below will still help. Use a potting mix intended for your plants, and check it and the container’s drainage separately. The garden-soil feel test and pH sampling advice are for soil in the ground.
Start with a small look ↓Have a look just below the surface
Choose a small accessible patch between plants. Gently move aside any leaves or surface covering and use a hand trowel to lift a little soil from below it, avoiding roots. Replace the soil and covering afterwards. There is no need to dig a large hole.
Soil includes mineral particles, decaying organic material and living organisms, with spaces holding air and water. Roots need those spaces as well as something to anchor into. A dark colour alone doesn’t tell you whether a soil will suit a particular plant.
A gritty sample that falls apart suggests more sand. A sticky sample that smears and rolls easily suggests more clay. Silt can feel smooth or slightly soapy. Many soils are mixtures; loam contains a balance of sand, silt and clay.
These are clues, not a laboratory result. Write “gritty and crumbly” or “sticky when damp” if that is what you can confidently say. Try another small sample within the area before deciding the first one represents it all.
Clay can hold useful moisture and nutrients, but may drain slowly and become hard when dry. Sand often drains readily but dries sooner. Neither is automatically bad soil. The useful question is how yours behaves where you want to grow.
Watch where the water goes
After rain, return to your chosen place. Record when the rain stopped and whether water is lying on the surface. Look again later and, if possible, the next day. A photograph from the same viewpoint can help you compare visits.
Notice the shape of the ground: does it slope towards this spot? Could water arrive from a path, roof or higher bed? A low point might receive runoff, but its position alone does not prove that it is waterlogged.
Gently check below the surface too. A dry-looking crust can hide moist soil. Describe what you find rather than deciding to water from the appearance of the top alone.
Moist soil contains water while still leaving air available to roots. When soil stays saturated, roots can run short of oxygen. A brief puddle after a downpour is different from ground that remains saturated for a long period.
Avoid walking on or digging soil while it is very wet: compaction can make matters worse. If saturation keeps recurring, investigate the source and duration before planting. Compost alone cannot fix a high water table or water continually arriving from elsewhere.
Don’t assume a wet winter spot stays wet in summer. Leave yourself a question to revisit in a dry spell.
Four words that are easy to muddle
In a garden centre, these words can sound interchangeable. Ask what you want the material to do before choosing a bag.
- Soil
- The ground your garden plants grow in. A bag labelled topsoil supplies soil, often for making up levels or filling a new bed; it is not the same as plant feed.
- Compost
- This word has two common meanings in UK gardening. Garden compost is decomposed garden and kitchen plant material used to improve soil. Potting compost is a growing mix designed for containers. Read the intended use on the bag.
- Mulch
- A covering laid on the surface, rather than a single particular ingredient. Garden compost, bark and gravel can all be used as mulches, but they have different properties. A compost mulch gradually decomposes; gravel does not.
- Fertiliser
- A source of nutrients supplied to plants. It does a different job from improving soil structure. Adding feed won’t resolve a plant’s lack of light or waterlogged roots.
Find out whether your soil is acid or alkaline
pH describes acidity or alkalinity: below 7 is acid, 7 is neutral and above 7 is alkaline. It helps you match plants to soil; it isn’t a score for how good your garden is.
Use a garden-soil pH kit and follow its instructions for sample depth, quantities, water and reading time. Collect the representative sample it specifies. Test distinct growing areas separately, rather than combining unlike places into one garden-wide result.
Recent additions can affect the reading. The RHS advises that testing within three months of adding lime, fertiliser or organic matter may be misleading. Note any recent treatment and test later if needed.
Record the result, place, date and method. An unclear colour is a reason to repeat the test, not invent a precise number. Laboratory testing is an option if results conflict or a planting decision depends on accuracy.
You don’t need to make every soil neutral. Start by looking for plants suited to your result. Avoid adding lime or acidifying products simply because a number seems wrong.
Now bring the clues together
Imagine your notes say: “Shaded by the house, sticky soil, lowest part of the garden, puddles after rain.” What would you do next?
That description raises a question about how long the ground stays wet. It does not yet tell you to dig it out, add fertiliser or buy plants labelled for shade. A shade-tolerant plant might still need good drainage.
“The lower bed gets little direct sun on the days I checked. Its soil feels clay-like. Water was still visible the morning after rain, but I haven’t checked it in summer. pH is not tested. Before planning, I’ll compare how long this bed and the higher bed stay wet.”
That note gives your next visit a purpose. Later, you can compare light, moisture, pH and exposure with a plant’s needs together. Some plants tolerate conditions outside their preference, but tolerance varies; surviving and thriving are different outcomes.
Choose a small step with a clear purpose
Ask: “What am I trying to improve?” If plants are growing well and the soil behaves usefully, there may be nothing urgent to change.
For many ordinary beds, a surface layer of well-rotted garden compost can help conserve moisture and gradually improve structure. Remove weeds first and apply it to moist, unfrozen soil, keeping stems and plant crowns clear. A layer around 5 cm deep is a practical starting point where this mulch suits the planting. Avoid covering low-growing plants.
This is not a universal prescription: plants needing very lean, dry conditions may need a different approach. A handful of grit added to heavy soil is not a dependable drainage solution. Persistent wetness needs its cause understood first.
Routine feeding is unnecessary for many established plants in garden soil. Pots and some productive crops have different needs. If feeding is justified, choose for the plant and follow the product’s dose and timing rather than adding extra “just in case”.
Keep your growing-place notes together
Select the same area you used for your light observations, or describe it under Whole garden. Keep what you saw separate from what you think it might mean. Unknowns are welcome.
Edit the prompts, add photos and save in the journal. Your entry keeps its date. These observations do not automatically overwrite your growing area’s settings.
You are getting to know a growing place
You now have a way to connect what you want from your garden with the conditions you can actually offer plants. You don’t need perfect knowledge to begin a small plan, but leave room to investigate anything that could change your choices.
When you feel ready, bring these observations into Your first border. Start with a manageable space and keep your unanswered questions alongside your ideas.
Sources and further reading
Practical prompts are written for this guide. These RHS resources explain the underlying advice in more detail:
- Soil types and identification
- Understanding pH and testing soil
- Waterlogging and flooding
- Gardening on wet soils
- Garden compost
- Mulches and mulching
- Fertilisers
Checked 18 October 2026. Choose actions for your actual soil, planting and conditions.
Garden design · A practical starting point
Plan your garden
Make a simple layout that works for the way you use your garden. Start with the space and its everyday jobs, then work towards the planting.
You can use this guide to improve an existing garden or plan a new one. A pencil sketch is enough for the first version. Keep it separate from any measured drawings needed for building work.
Why make a plan?
A plan helps you spot problems before you spend money: a table that blocks the route to the shed, a bed you cannot reach or a sitting area that loses the sun before you use it. It also lets you decide what to keep and tackle changes in a sensible order.
You do not need to redesign everything. A better route, a well-placed seat or one improved planting area may do more for the garden than a complete rebuild.
What you need
Paper, pencil, eraser, ruler and tape measure. Tracing paper or copies of your sketch make it easier to compare layouts. A hose or rope is useful for trying outlines on the ground.
1. Decide what the garden needs to do
Write down the activities the space must accommodate. Include ordinary jobs such as taking bins out, drying washing, storing tools and reaching the compost heap, alongside sitting, playing and growing plants.
Choose a few priorities. Separate essentials from things you would enjoy if there is room. Ask everyone who uses the garden what they need, including anyone who finds steps, narrow gaps or uneven ground difficult.
Why? A list of features can fill a garden without making it useful. Describing the activity helps you judge whether a proposed layout actually works.
2. Draw what is already there
Sketch the outline, then mark the house, doors, gates, existing paths, trees, buildings and visible drain covers. Measure the main dimensions and mark anything estimated. Check diagonals where possible: a garden that looks rectangular may not be square.
Transfer the measurements to a simple scale drawing. At 1:100, 1 cm on paper represents 1 m on the ground. Use the same scale throughout and write it on the sheet. Keep this base drawing unchanged and try new layouts on copies.
Mark slopes, low points, wet patches, sunny areas and shade from your earlier observations. Use different pencil marks for things to keep, things you might change and anything still uncertain.
Why? Existing features and growing conditions affect what will fit. Keeping a record of them avoids designing an attractive arrangement that cannot work on the ground.
3. Place the main areas
On a copy of your plan, draw loose shapes for sitting, growing, play, storage and any other priorities. These shapes show approximate positions, not finished edges. Try more than one arrangement before refining it.
Match the location to its use. Check the light at the time you would sit outside, rather than choosing the sunniest spot at midday. Consider shelter and privacy too. Keep frequently used things convenient: an awkwardly placed tool store remains awkward even when hidden by beautiful planting.
Why? You are choosing places for activities, not just filling gaps on a drawing. Test the location before committing to construction.
4. Check paths and working space
Join the places you use with routes. Start with the journeys made most often: door to gate, bins to collection point, shed to beds. A route should remain usable when doors are open and nearby plants have grown.
Mark a proposed path with rope and walk it carrying the things you normally move. Try the wheelbarrow or mobility aid used in your household. Check turns and passing spaces, not just the straight sections.
Allow room to pull chairs out, open a greenhouse door and work beside a bed. Avoid creating narrow leftover strips that are difficult to mow or weed. For surfaces and changes of level, plan for the people who will use them and get suitable construction advice before building.
Why? A path that looks generous on paper may be cramped in use. Testing with actual furniture and equipment exposes problems before edges and surfaces become permanent.
5. Consider views and privacy
Look from the windows you use most, the main doorway and each intended seat. Mark views worth keeping and places where you would welcome screening. Check the view at seated height as well as standing.
A screen may only need to interrupt one line of sight. Test its position with a temporary marker before assuming you need a tall boundary all the way around. Consider the light it would block and the room its planting would eventually occupy.
Check what changes in winter. Deciduous planting may provide summer privacy but leave a more open view after leaf fall. Evergreen planting keeps foliage, but still needs to suit the site and available space.
Why? You experience the garden from particular places. Designing for those views can make a useful improvement without enclosing the whole plot.
6. Give the planting a clear role
Decide what each planting area is meant to do: soften a boundary, frame a seat, provide food, offer seasonal interest or create habitat. Then match plants to the light, soil and moisture available there.
Draw beds as usable shapes, with room to reach plants for maintenance. Allow for mature spread rather than the size of nursery pots. Keep access to gates, paths and service points clear as plants grow.
For a coherent appearance, try repeating a material, plant shape or colour in more than one place. This is an option to experiment with, not a rule that every garden must follow.
Consider foliage and structure before choosing everything by flower colour. Flowers can be brief; leaves, stems and the overall shape may affect the view for much longer. If using contrasting flower colours, check that their flowering times overlap. Look at what remains in winter too.
Why? Planting works best when it has enough room and a purpose within the layout. It can then contribute to the garden throughout the year, rather than only during a short flowering display.
7. Test the layout and choose an order
Mark proposed bed edges and routes on the ground. Put chairs in place and walk the main journeys. Check the arrangement from the house. Move the markers if something feels cramped or blocks a useful view.
Compare two versions against your priorities, maintenance expectations and budget. Estimate costs for the whole proposed change, including preparation and materials, before choosing the first phase.
Deal with work that would disturb later planting first. Keep access for materials and avoid placing a new bed where you will need to wheel heavy loads through it. If drainage, large trees, structural work or major level changes affect the plan, resolve those questions with suitable advice before construction.
Why? Testing and phasing reduce avoidable rework. The first change should still make sense within the eventual layout.
Keep your working plan
Save the priorities and decisions that explain your layout. Add a photograph of your paper sketch in the journal editor. Choose Whole garden for the overall plan, or select an existing area for a smaller project.
This opens an editable journal entry. Add your sketch as a photo and press Save to keep it. Saving a note does not create or move garden areas.
Plan one planting area in detail
Once you have a position and purpose for a border, use Your first border to compare plants, work out an arrangement and prepare for planting.
Sources and further reading
This is an introductory layout guide. For more on surveying, site assessment and planting design:
Sources checked 19 October 2026.
Garden design · Colour and planting
Colour in your garden
Choose colours that work with the whole plant, the season and the setting. Flowers are part of the scheme; leaves, stems, pots and walls belong in it too.
Start with one border, a group of containers or the view from a seat. Coloured paper, paint samples or photographs are useful for trying combinations before buying plants.
Why plan colour?
A colour plan helps you choose plants that contribute to a display you enjoy. It also helps explain why a combination feels too busy, too flat or different from the picture you had in mind.
You do not need one colour scheme for the whole garden. A bright group of pots near the door and a quieter planting beside a seat can serve different purposes. Treat colour theory as a way to compare options, rather than a test of good taste.
Include what is already there
Look at the planting against its actual background. A red-brick wall, pale paving, dark fence or terracotta pot occupies part of the view even when nothing is flowering. Keep those colours in your first palette.
Identify the foliage that will remain. Green varies from yellow-green to blue-green and from pale to almost black. A large evergreen shrub may contribute much more colour than a small group of flowers beside it.
Why? A combination chosen against a white catalogue page may look quite different against your fence. Work with the view you will actually see.
Three useful things to distinguish
- Hue — which colour?
- The colour family, such as yellow, blue or red. The traditional artist’s colour wheel places related hues beside each other and contrasting pairs opposite.
- Value — how light or dark?
- Pale pink and deep burgundy can differ strongly in lightness even though both belong broadly to the red family. Light–dark contrast can separate plants without adding another hue.
- Saturation — how vivid or muted?
- A strong orange and a muted peach have different intensity. A small amount of vivid colour can stand out among softer colours.
These distinctions help when a label such as “purple” is too vague. Compare the actual flowers and leaves where possible: two purple plants may differ in warmth, depth and intensity.
Why? Choosing by colour name alone can miss the difference that makes a planting work. Look at lightness and intensity as well as hue.
Three combinations to try
The examples below use the traditional red–yellow–blue artist’s wheel as a planning aid. The swatches illustrate relationships, not exact plant colours or planting proportions.
Related colours
Blue · violet · mauve, with green foliage.
Neighbouring hues can create a connected effect. Vary the lightness and leaf shapes so the planting still has definition.
Complementary colours
Violet · yellow, with green foliage.
Opposite hues give stronger contrast. Try one as the main flower colour and the other in a smaller amount, then reverse them to compare.
One hue, several values
Pale pink · rose · burgundy, with green foliage.
A narrow palette can still have strong light–dark contrast. This is a flower-colour idea; the green leaves remain part of the overall display.
Why? Comparing a few approaches is easier than choosing from every possible colour at once. Keep the one you enjoy, or combine ideas; none is compulsory.
Change the amount before changing the colour
An accent is a small area that catches attention. A few bright flowers among softer planting create a different effect from a whole bed of the same bright colour. Consider the area of colour visible from your viewing point, not just the number of plants.
Try coloured paper in unequal pieces: a broad area for the background, a smaller one for the main flower colour and a small accent. Increase the accent and compare the result. There is no required percentage.
Repeat a colour in another part of the border if you want to connect the view. The repetition could come from a leaf, flower or pot rather than another identical plant.
Why? Sometimes a combination needs a change in balance rather than a different plant. Test the amount first.
Plan for the months between flowers
Check how long each plant flowers and what it looks like afterwards. A flower may last only a few weeks, while its foliage occupies the border for months. Some perennials disappear above ground in winter; coloured foliage is not automatically evergreen.
For every shortlist plant, note its leaf colour, shape, mature size and main season of interest alongside the flower colour. Include seedheads, bark or stems where they contribute to the display.
Two flowers can only form a colour pairing if they are present together. Check likely flowering periods for the actual varieties and your conditions. A spring display followed by a different summer palette is a succession, not a simultaneous combination.
Colour is only one selection criterion. Plants placed together must also suit the available light, moisture and soil, and have enough room. Do not put a dry-site plant in a damp bed simply to complete a palette.
Why? A useful colour plan describes a living garden through time, rather than combining photographs taken in different months.
Check light, background and distance
Compare a colour sample in the proposed position in sun and shade, and at the time you usually use the garden. Look from the house as well as close up. A small flower that is clear beside the path may barely register from a window.
Warm reds, oranges and yellows often attract attention; blues and violets can appear more recessive. Lightness, intensity, background and the size of the colour patch also affect this. These are tendencies to test, not guarantees that a colour will make your garden look larger.
Foliage colour can also change with season and growing conditions. Check the cultivar’s needs instead of assuming that all gold, purple or silver leaves prefer the same position.
Why? The colour on a screen is only a guide. Your garden’s light and background determine the display you live with.
Build a small palette before choosing plants
- Photograph one view and list the background colours you intend to keep.
- Choose a related, contrasting or single-hue flower palette. Add the foliage colours rather than leaving them out.
- Try a larger background area and smaller accents using paper samples. Check the combination in the intended place.
- Shortlist plants that suit the site, then compare their flowering periods, foliage and mature size. Remove any combination that depends on incompatible conditions.
- Look at the plan without the flower colours. If it loses all interest, reconsider the leaves, shapes or seasonal structure before adding more flowers.
This gives you a practical brief for plant selection. You can still choose a favourite plant outside the palette; decide where it belongs and what effect you want it to have.
Add a photo of your samples or sketch in the journal editor, then press Save. This records an idea; it does not add plants to your garden.
Use the palette in your border plan
Bring your colour choices into the border’s palette notes, then arrange plants for size, shape and growing conditions as well as colour.
Sources and further reading
The palette samples and exercises are illustrative. For more on colour relationships and foliage:
- Gardeners’ World: How to use colour in the garden
- RHS: Colour relationships in plant displays — colour principles illustrated with houseplants.
- RHS: Trees and shrubs with colourful foliage
- RHS: Planning a border
Sources checked 20 October 2026. Colour effects are subjective; check individual plant requirements.
Garden design · Flowers, foliage, berries and winter interest
Colour through the seasons
A border can look wonderful in June and rather quiet by August. This often happens when we choose plants that are flowering together at the garden centre.
To spread the display, look beyond what is flowering today. Consider when each plant contributes something: flowers, fresh leaves, autumn colour, berries or winter stems.
Start with the months that matter to you
Choose one border or one view from the house. Decide when you would most like it to look good.
You might want flowers around a summer seating area, or something colourful outside the kitchen window through the colder months. A concentrated summer display and a longer succession of smaller displays are both worthwhile choices.
Why? A clear aim makes plant selection easier. A small border does not have to provide a spectacular display every month.
Put flowering times beside each other
Write your proposed plants down the left side of a page, with the months across the top. Mark the expected flowering period for each particular variety.
Look for two things:
- Overlap: plants flowering together, so their colours and shapes can form a combination.
- Succession: another plant beginning its display as an earlier one finishes.
Treat flowering periods as a guide. Weather, location and growing conditions can shift the timing. Leave some overlap instead of expecting one plant to take over on an exact date.
Why? This reveals whether your choices extend the flowering season or simply add more flowers to the same few weeks.
Give leaves a place in the plan
Beside each plant, note what its foliage contributes before and after flowering. Consider colour, leaf shape and how much space the plant will occupy.
Then look at the plan with the flower colours covered. Does the planting still have shapes and contrasts you enjoy?
Some plants are worth growing for a brief, beautiful display. They do not all need to look remarkable for months, but their neighbours can help carry the border when that display is over.
Plan an autumn display
Autumn foliage can change the colour scheme completely. A planting that is mostly green in summer may gain yellow, orange, red or purple as leaves turn.
Research the particular species or variety you are considering. Note its autumn colour separately from its summer foliage, and remember that the intensity and duration can vary between years.
Why? Autumn colour is another contribution a plant can make, rather than simply the end of its useful season.
Include berries and fruit
Pyracantha illustrates this well: its flowers are followed by red, orange or yellow berries, depending on the variety. The later display deserves its own place in the plan.
Check what a chosen plant needs to produce fruit. Pollination requirements vary, and pruning can remove flowering or fruiting growth. Birds may also shorten the berry display.
Why? A photograph of a heavily berried shrub shows a possibility, rather than a guaranteed display lasting until a particular month.
Look at what remains in winter
Check which plants retain their leaves and which lose them. Include stems, bark and seedheads where these provide a useful feature.
Look particularly at the parts of the garden visible from indoors. A winter feature has more value if you can see and enjoy it.
Make one useful adjustment
Review your plan season by season. Find the period you most want to improve, then look for a suitable plant that contributes at that time.
Check its light, soil, moisture and space requirements before adding it. You may be able to replace a duplicate seasonal role rather than squeeze another plant into the border.
The aim is a garden with changing displays you enjoy—and a reason for each plant you choose.
Keep this with your garden plan
If useful, save your decisions or add a photograph of your sketch in Garden notes.
Edit the prompts and add a photo in the journal editor, then press Save. Opening a draft does not save it or add plants to your garden.
Continue your plan
Sources and further reading
Sources checked 20 October 2026. Examples illustrate planning principles; check the requirements of each plant and variety.
Garden design · Size, spread and spacing
Give plants room to grow
A plant in a small pot can look lost in a newly prepared border. It is tempting to move its neighbours closer or buy extra plants to fill the gaps.
Before you do, check how much room those plants will need as they grow. You are arranging their future shapes, not just the pots in front of you.
Read height and spread together
Plant descriptions usually give two measurements:
- Height: how tall the plant is expected to become. For flowering perennials, check whether this includes the flower stems.
- Spread: how wide it is expected to grow across, not how far it extends on each side.
A plant described as 60 cm wide needs roughly 30 cm on either side of its centre. That measurement describes its above-ground width; it is not a boundary for its roots.
Check the full plant name, including the variety. Different varieties of the same plant can grow to quite different sizes.
Why? Height helps you imagine the view. Spread helps you decide whether the plant will fit.
Treat the measurements as a guide
Look for an expected size range and, where available, the time taken to reach it. Growing conditions affect the result, and plants do not all grow at the same speed.
A slowly developing shrub and a vigorous perennial may occupy their allotted space at very different times. Some spreading plants also need occasional division or control.
Do not assume that every plant can be kept small by cutting it back. Check its response to pruning before making that part of your plan.
Measure between the centres
When an instruction says “plant 50 cm apart”, measure from the centre of one plant to the centre of the next—not between the edges of their pots.
For two plants of different widths, a useful starting estimate is half the width of each added together. A plant expected to spread 60 cm and another expected to spread 40 cm would have centres about 50 cm apart if their outlines were just touching.
This is a layout estimate, not a universal planting rule. Follow specific spacing advice where it is available.
Why? Measuring between pot edges gives different results depending on the size of the plants you buy.
Decide how the plants should meet
A border does not need a visible gap around every mature plant. Leaves can mingle, and groups of perennials often look attractive when they grow together.
The question is whether the neighbours can develop well together. A vigorous plant may crowd a smaller, slower-growing one even when both looked comfortably spaced on planting day.
Closer planting can produce a fuller display sooner, but may mean more thinning, moving or dividing later. Choose that deliberately rather than treating it as a shortcut without consequences.
Check the edges and access
Mark the expected plant outlines on your sketch, or lay out circles with string on the ground. Check whether mature growth would cover a path, obstruct a gate or make maintenance awkward.
Allow extra room where you want a clear walking route. A little foliage spilling over an edge may be welcome; having to push through it every time you pass may not be.
Let a new border look new
Some visible soil between young plants is normal. Keep those spaces weeded and use a suitable mulch where appropriate, leaving plant crowns clear.
Avoid adding more permanent plants simply because the border looks sparse at first. Give the original planting time to show how it develops.
Try this before digging
Set the plants out in their pots. Measure between their centres, then imagine their mature outlines. Look from your usual viewing point and walk along the nearby path.
Adjust the positions while they are still easy to change.
Why? A few minutes with a tape measure can save the cost and work of moving an overcrowded planting later.
Keep this with your garden plan
If useful, save your decisions or add a photograph of your sketch in Garden notes.
Edit the prompts and add a photo in the journal editor, then press Save. Opening a draft does not save it or add plants to your garden.
Continue your plan
Sources and further reading
Sources checked 20 October 2026. Examples illustrate planning principles; check the requirements of each plant and variety.
Garden design · Make a border feel connected
Shape, layers and repetition
When choosing plants, flower colour often catches our attention first. But stand back from a border and you also notice rounded clumps, upright stems, arching leaves and the spaces between them.
Working with these shapes helps you arrange plants so they look good together, including when they are not flowering.
Start with the whole plant
Look for a photograph of the plant growing in a garden, rather than only a close-up of its flowers. Notice its outline:
- Rounded or mound-shaped: a broad, gently curved clump.
- Upright: stems or leaves that draw the eye upwards.
- Arching: growth that rises and bends outwards.
- Low and spreading: growth that extends across the ground.
- Airy: an open arrangement of stems and leaves that allows you to see through it.
A plant can combine several of these qualities. Its foliage might form a low mound while its flowers rise on tall, slender stems.
Why? Two plants with similar flower colours can occupy the border very differently. Their overall shapes help you decide where each belongs.
Try a contrast in leaves
In planting design, texture describes how fine or bold a plant looks, as well as the surface of its leaves.
Broad, solid leaves can contrast with narrow blades or finely divided foliage. You can use this even in a planting that is mostly green.
Try placing photographs of two possible neighbours beside each other. Do their leaves look distinct, or do they merge into a similar-looking mass? Either effect can be useful: contrast draws attention, while similarity can create a quieter area.
Why? Leaf contrasts give you another way to make an interesting combination without needing more flower colours.
Build layers from your viewing point
Stand where you will usually see the border: a path, a seat or a window.
For a border viewed mainly from one side, placing substantial taller plants towards the back is a useful starting point. Smaller plants can remain visible in front. In a bed viewed from several sides, taller planting may sit further towards the middle.
You do not need three straight rows. Let groups overlap in the view, with some extending forwards and others sitting further back. A tall, airy plant may work near the front because it does not hide everything behind it.
Why? Layers let you see several parts of the planting at once and give the border depth. Check how solid a plant looks, not just how tall it grows.
Repeat something you enjoy
Choose one plant from your shortlist and try using it in more than one place. A recognisable clump appearing again further along the border can connect the planting.
Repetition can also come from a similar leaf shape, flower form or colour in different plants. This is useful where growing conditions change across the bed: you can repeat an effect without forcing the same plant into unsuitable positions.
Regular spacing gives a more ordered pattern. Unequal spacing and different-sized groups can create a looser arrangement.
Why? Repeated features give the separate parts of a border something in common. They also leave room for favourite plants that appear only once.
Make groups fit the space
Several smaller plants together can create a visible patch of foliage or flowers. One substantial plant may already provide that effect on its own.
Base the group size on mature spread and the space available. Advice to plant in threes or fives can be a starting point, but an odd number is not a requirement. Do not squeeze in an extra plant just to complete a group.
For a narrow border, a few repeated shapes may be enough. There is no need to fit every possible layer into it.
Check when the shapes will be present
A flower spike may provide an upright accent for only part of the year. A leafy mound may disappear above ground in winter.
Use your seasonal plan to check whether the shapes you are combining will be visible together. Decide what will hold the arrangement together when the flowers or foliage have gone.
Try the arrangement before planting
- Sketch the border and mark your main viewing point.
- Draw the larger plant outlines at their expected mature widths.
- Add a contrasting shape, then repeat one chosen plant or group elsewhere.
- Check that smaller plants remain visible and that paths stay clear.
- Set out the pots and look from your usual viewing point before digging.
If the arrangement feels too busy, try repeating an existing choice before adding another variety. If it feels too uniform, try one contrasting shape.
Why? Moving a pot or changing a sketch is easy. This gives you a chance to see what each choice contributes before committing it to the ground.
Keep this with your garden plan
If useful, save your decisions or add a photograph of your sketch in Garden notes.
Edit the prompts and add a photo in the journal editor, then press Save. Opening a draft does not save it or add plants to your garden.
Continue your plan
Sources and further reading
- RHS: Planning a border
- RHS: Creating a border
- Kew: Recreate Kew in your garden
- Verve Garden Design: Repetition in garden borders
Sources checked 20 October 2026. Examples illustrate planning principles; check the requirements of each plant and variety.
Garden design · From measurements to a shopping list
How many plants do I need?
Once you have chosen your plants, you need to decide how many to buy. Start with the space available and the spacing each plant needs, rather than the number of pots that look good together at the garden centre.
You will need a tape measure, paper and pencil, and the spacing information for your chosen plants.
Measure the planting space
For a rectangular border, multiply its length by its width:
3 metres long × 2 metres wide = 6 square metres.
For a curved or irregular border, sketch the outline and divide it into smaller rectangles and triangles to estimate the area. It does not need to be perfectly precise for an initial plan.
Mark existing plants, stepping stones and any spaces you need to keep clear. Allow for the future size of plants you are keeping, not just their current footprint.
Why? The whole border area is not necessarily available for new planting. Measuring first helps prevent buying plants for space that is already needed.
Find a spacing for each plant
Look for a planting distance on the label or in reliable nursery guidance. Measure this from the centre of one plant to the centre of the next.
If no spacing is given, use the plant’s expected mature spread as a starting point, then check advice for that particular plant and the effect you want. Some perennials can grow together into a continuous planting; others need more separation.
The size of the pot tells you what you are buying now, rather than how much space the plant will eventually need.
Use a simple calculation for an evenly spaced group
Suppose your clear planting area is 3 metres by 2 metres, and the chosen plants will be about 50 cm wide, planted 50 cm apart.
Convert 50 cm to 0.5 metres, then work out:
- Along the length: 3 ÷ 0.5 = 6 plants.
- Across the width: 2 ÷ 0.5 = 4 plants.
- Total: 6 × 4 = 24 plants.
In this example, the outer plant centres sit 25 cm inside the boundary, leaving room for half their expected width.
A useful estimate for this square arrangement is:
Number of plants ≈ planting area ÷ (spacing × spacing)
Use metres throughout. Here, 6 ÷ (0.5 × 0.5) gives the same answer: 24.
Why? This turns a spacing recommendation into a starting quantity. It does not mean every six-square-metre border needs 24 plants.
Check the layout before accepting the number
The calculation assumes equal spacing in both directions. Curved edges, staggered arrangements and different boundary clearances can change the count.
Draw the actual planting positions. If your calculation gives a fraction, do not automatically round up and squeeze another plant in. Check what fits while preserving the spacing.
RHS similarly recommends counting positions on a scaled plan for more complicated planting patterns.
For a mixed border, count the planned positions
A border containing shrubs, grasses and smaller perennials cannot use one spacing for everything.
Draw the larger plants first, using circles or outlines to show their expected widths. Add the smaller groups around them, allowing for their own spacing. Label each planting position with a letter linked to the full plant name.
Then count each letter. If you have placed the same perennial in two groups of three, your plan needs six of that plant.
Why? Counting the positions checks both quantity and arrangement. Dividing the whole border by one average spacing can hide overcrowding around larger plants.
Turn the plan into an order
For each chosen plant, record:
- Full plant name, including the variety.
- Quantity shown on the plan.
- Suitable plants you already have.
- Quantity still needed.
- Pot size or plant format you intend to buy.
For example, six needed minus two already available means four to buy.
Check whether a supplier’s price is for one plant or a pack. Keep bulb quantities separate from potted-plant quantities, and check their planting positions too.
Smaller plants may cost less, but plugs can need growing on and additional care before planting out. Choose a format you can look after.
Make one final check
Before ordering, confirm that every plant has a place, enough room and suitable growing conditions. If the cost is too high, complete one planned section first or revise the selection.
You can buy gradually without reducing the space each plant needs.
Keep this with your garden plan
If useful, save your decisions or add a photograph of your sketch in Garden notes.
Edit the prompts and add a photo in the journal editor, then press Save. Opening a draft does not save it or add plants to your garden.
Continue your plan
Sources and further reading
Sources checked 20 October 2026. Examples illustrate planning principles; check the requirements of each plant and variety.
Garden design · Choose care you can manage
Plan for the care you want to give
Choose plants for the way you want to garden as well as the way you want the border to look.
A favourite plant can be worth a little extra attention. Before buying it, find out what that attention involves, when it is needed and whether you can provide it.
Choose the work you enjoy
Think about an ordinary busy week. Would you enjoy tending a few pots near the door, or prefer an established border that needs attention mainly at particular times of year?
Consider carrying water, bending, lifting, access to tools and help while you are away. Keep plants needing frequent attention where you can reach them comfortably and notice when something needs doing.
Why? A planting is easier to look after when its demands fit your everyday life. You can give extra attention to a few favourites and keep the rest simpler.
Separate establishment from ongoing care
Establishment is the period when a newly planted plant develops roots into the surrounding soil. A plant described as drought-tolerant once established can still need careful watering while it settles in.
Make two short lists for the border: help needed after planting, and jobs likely to continue in later years. Include moisture checks and weed control in the first list. Establishment takes different amounts of time for different plants and conditions.
Why? “Low maintenance” does not mean a new planting can be left to manage immediately. Plan planting for a period when you can provide aftercare, or start with a smaller section.
Match watering needs to the place
Compare the plant’s moisture requirements with what you learned about the soil. A moisture-loving plant in a dry position may need continuing watering even after establishment. If regular watering is something you want to avoid, look for a plant better suited to that spot.
Containers generally need closer attention to watering than established plants in the ground. Check how you will reach them with water and what will happen during holidays or hot weather.
Use soil or compost moisture and the plant’s needs to decide when to water. A reminder can prompt a check; it is not an instruction to water regardless of conditions.
Why? Matching plants to the available moisture can reduce recurring work. The route from the tap matters too.
Find out whether stems need support
Staking means using canes, rings or other supports to help stems stay upright. Some tall plants and those with heavy flowers may need it, particularly in exposed positions.
Check the particular variety. If it needs support, allow for buying or making it, putting it in while growth is still manageable, and checking ties as stems develop. Supports are usually easier to place before plants become tall and crowded.
If that job does not appeal, compare plants described as self-supporting in conditions like yours. A shorter variety may help, but height alone does not tell you whether a plant will flop.
Why? Supporting vulnerable stems can prevent breakage and keep them from collapsing over neighbouring plants.
Allow for occasional division
Dividing means separating a suitable perennial clump into smaller rooted pieces and replanting them. It can help manage an expanding plant or renew a congested clump.
Before choosing a plant, check whether it is likely to need division and how vigorously it spreads. Some can remain undisturbed for a long time; others need attention sooner. There is no single interval for every perennial.
Allow access to lift the clump and consider whether you would need help with a large root mass. Check plant-specific advice before dividing: suitability and timing vary.
Why? A small purchase can become a substantial physical job later. Knowing this helps you choose manageable plants and leave working space.
Know what winter protection involves
Check whether the plant can remain outside in your local conditions, including winter wet as well as cold. A sheltered garden and an exposed one can offer very different prospects.
Protection might involve moving a pot, lifting and storing tubers, or covering a plant in place. The method depends on the plant and site; a layer of mulch is not a universal solution.
If a plant needs storage, identify the actual space before buying it. Is it suitable for the required temperature, light and ventilation? Can you move the pot or lift the plant comfortably? An unheated greenhouse is not automatically frost-free.
Why? Winter care needs somewhere to happen. A suitable hardy alternative may fit your garden better if storage or protection is impractical.
Check the other recurring jobs
Look through the care information for pruning, cutting back, feeding and removing faded flowers, known as deadheading. Find out which jobs the plant needs and which are optional ways to influence its appearance or flowering.
Check mature size too. Choosing a shrub that fits its space can avoid making repeated size reduction part of your routine. Containers may also bring repotting and feeding into the plan.
Why? Several individually manageable plants can still create a demanding collection when their jobs fall at the same time. Consider the whole border.
Make a care note before buying
Take one plant from your shortlist and write down:
- The support it needs while establishing.
- Checks or jobs that recur during the growing season.
- Seasonal work, such as fitting supports or winter protection.
- Occasional work, such as division or repotting.
- Equipment, storage or help you would need.
Mark anything uncertain and check the exact variety with the nursery or a reliable growing guide. Then compare the combined demands of your choices. Keep the plants whose care you are happy to provide; change the quantity, position or selection where necessary.
You do not need to estimate every job in minutes. Knowing what must happen, roughly when and whether you can do it is enough to improve the plan.
Why? You can make these decisions while they are still easy to change, before bringing home a plant whose care does not suit you.
Keep this with your garden plan
Save a short care plan for the border or growing area you are considering.
Edit the prompts and add a photo in the journal editor, then press Save. Opening a draft does not save it or create tasks.
Put your choices into practice
Use Your everyday gardening when you need practical instructions for a particular job, or return to your border plan to adjust the planting.
Sources and further reading
- RHS: Low maintenance gardening
- RHS: Growing perennials
- RHS: Drought-resistant plants
- RHS: Staking perennials
- RHS: Dividing perennials
- RHS: Overwintering tender plants
Sources checked 21 October 2026. Care requirements vary with the plant, variety, growing conditions and stage of establishment.
Garden design · Try the plan on the ground
Try the layout before planting
Mark the border, set out the plants and make adjustments while everything is still easy to move.
A sketch helps you plan, but standing beside the proposed planting reveals things paper can miss: a squeezed path, a hidden view or a plant that needs more room.
Try the border outline before preparing the ground. Once the soil is ready, check the final plant positions before digging individual planting holes.
Gather a few simple things
Bring a tape measure, your sketch and plant list, a garden hose or rope for curves, and string for straight edges. Keep labels with each plant.
If you have not bought the plants yet, use labelled empty pots or other movable markers. Write the expected height and spread on the labels so you can imagine the grown plants.
Why? You can test the space before spending money or committing to a permanent edge.
Lay out the border edge
Place a hose or rope along the proposed curve, or use a string line for a straight boundary. Measure the length and depth against your sketch.
Look along the edge as well as straight towards it. Adjust awkward bends and check that narrow parts still have room for the plants you want. Choose straight or curved lines to suit the space; neither is automatically better.
For an existing border, keep the outline for now and mark the area you intend to change.
Why? Moving a hose is simple. Changing an edge after turf has been removed takes more work.
Walk past it and check your reach
Use the paths as you normally would. Open nearby gates and doors. If you take a wheelbarrow or mower along the route, try it with the proposed edge in place.
Think about how you will weed, water and reach plants for dividing or supporting. For a deep border, decide where you will gain access. Allow for foliage extending towards the path as plants mature.
Adjust the outline if the space feels awkward to use. Keep temporary markers clear of walking routes and remove them when the trial is finished.
Why? A border should work alongside everyday movement and maintenance, as well as look attractive.
Set out the main plants first
Once the border is prepared, place plants on the surface while they are still in their pots. Begin with the larger shrubs or the main clumps that determine the arrangement, then add the smaller groups around them.
Keep any existing plants you are retaining in the plan. On wet ground, assess the layout from the edge and wait until the soil is workable before moving around on it.
Check pot moisture while you work, especially in drying weather. Keep roots covered until you are ready to plant; use markers to try positions for bare-root plants.
Why? Starting with the main plants gives the arrangement a clear starting point. Keeping plants in their pots makes adjustments straightforward.
Measure the space the plants will grow into
Check distances from the centre of one pot to the centre of the next, using the spacing chosen for those plants.
Lay short lengths of string around a few positions to represent mature widths. For a plant expected to be 80 cm wide, imagine roughly 40 cm extending from its centre in each direction. This represents the above-ground outline, not the limits of its roots.
Check height on the label too. A small plant with little visible growth today may eventually obscure its neighbour or a view. Some planned overlap is fine; use the growing habits and spacing guidance rather than filling every visible gap.
Why? A row of small nursery pots can look sparse even when the future plants already have all the room they need.
Arrange the smaller groups
Set out repeated plants where you want them to connect the planting. Try shifting a whole group rather than moving every pot separately. Check that smaller plants will remain visible from your main viewing point.
As you move plants, recheck light and moisture conditions. A better-looking position still needs to suit the plant. Remember that flowers currently on sale together may not represent the border’s display throughout the year.
Why? This is where the earlier decisions about shape, repetition and seasonal interest become an arrangement you can inspect.
Step back to the places you actually use
Look from the house, the path and your usual seat. Sit down as well as standing up. For a bed seen from several sides, walk around it.
Check whether the main shapes are balanced, whether repeated groups are easy to notice and whether you are keeping the views you enjoy. Imagine the mature heights, not just the display in the pots.
Try one change at a time and compare it with the previous arrangement. A photograph can help you compare versions, although it cannot replace checking dimensions.
Why? You will usually enjoy the border from these places, rather than looking straight down at it while planting.
Record the positions before lifting the pots
Take a photograph of the arrangement and update your sketch. Label the groups and note key distances from fixed points, such as a border corner or path edge. Count the plants again if you changed the group sizes.
When the ground and conditions are suitable for planting, work through the arrangement one plant at a time. Mark its centre, move the pot aside, dig the hole and plant it before moving on. This helps keep the layout intact.
If you are not planting yet, keep the plants in suitable conditions and continue their care. Your saved sketch lets you recreate the arrangement later.
Why? Once several pots have been moved, their intended positions are surprisingly easy to lose. A clear record makes planting easier and gives you something to refer to as the border develops.
Keep a record of your layout
Save the main measurements and a photograph of the final arrangement with the relevant growing area.
Edit the prompts and add a photo in the journal editor, then press Save. Opening a draft does not save it or change plant locations.
Ready to plant?
Use the practical planting guides in Your everyday gardening for the next steps, or return to Your first border to update the plan.
Sources and further reading
- RHS: Creating a border
- RHS: Planting perennials and choosing spacing
- Thrive: Making new garden beds and borders
- RHS: Planning a border
Sources checked 21 October 2026. The layout trial is a planning exercise; check individual plant requirements before planting.
Garden design · Learn from the planting
Let the garden develop
Your first summer shows you the beginning of the border. Over the following seasons, you will discover which parts work well and which need a little adjustment.
Plants grow at different rates, spread into neighbouring spaces and change with the seasons. Keep your plan, but let what happens in the garden help you improve it.
Allow the first summer to look young
Step back and look at the planting as a whole. You may see plenty of soil between small plants, even where you have allowed the right spacing. Check your plan and the expected spread before assuming you bought too few.
New plants need to establish roots in the surrounding soil. Some perennials make substantial growth quickly; others and many shrubs take longer. There is no fixed year when every border becomes full.
Why? Filling every gap now can leave plants crowded later. Healthy, developing plants may simply need their planned space and appropriate establishment care.
Compare similar stages of the year
Take a photograph from a place you can easily stand again. Note the date, when the border was planted and anything unusual about the weather.
Next spring, compare it with last spring as well as with the previous summer. Many herbaceous perennials lose their above-ground growth for winter, and they do not all reappear at the same time. Check what is normal for the particular plant before treating a bare patch as a loss.
Why? A quiet winter border and a summer border are different views of the same planting. Seasonal comparisons make development easier to recognise.
Find out what a gap means
Look at your labels and planting sketch. Is this room reserved for a growing plant, the position of something dormant, or a place where a plant has died? Keep dormant positions labelled and remove weeds carefully around them.
A border can also feel quiet because little is flowering, although its plants already occupy the available space. Look at foliage, stems and seasonal interest before buying more. You might eventually replace one plant rather than squeeze another between established clumps.
Why? An empty space and a gap in seasonal interest need different solutions.
Investigate a plant that is getting worse
Increasing wilt, browning or dying shoots during the plant’s normal growing season deserve a closer look. Do not assume that a struggling plant only needs more time.
Check moisture in the original root ball and the soil beside it, gently, without lifting the plant. A damp surface can hide dry roots; persistently wet soil can cause problems too. Review planting depth, light and recent weather against the plant’s requirements.
Why? The same visible symptom can have several causes. Extra water or fertiliser may not help. If the cause remains unclear, record the symptoms and seek plant-specific guidance before treating or replacing it.
Notice what happens when neighbours meet
As the planting fills out, look between the larger plants. Are smaller neighbours still growing well and visible? Is one vigorous clump spreading over another, or has a shrub begun shading plants that previously received sun?
Some mingling is part of an attractive border. Look for actual difficulties, such as smothered growth, an inaccessible path or more maintenance than you want, rather than treating every touching leaf as a problem.
Why? The relationships between plants change as they grow. Your observations reveal which combinations suit this particular space.
Make a change for a clear reason
Choose one awkward part and decide what would improve it. You might reduce a suitable perennial by dividing it, move a small plant to a better position, or replace something repeatedly struggling with a plant better suited to the conditions.
Check the species, suitable season and aftercare before moving or dividing. Not every perennial needs division, and established shrubs can be difficult to move successfully. Keep healthy arrangements you enjoy.
Why? A few purposeful changes are easier to assess than a complete rearrangement. Plants also avoid repeated root disturbance, and you can see whether your decision helped.
Leave yourself a useful record
Save a photograph and a few words about what worked, what concerned you and any change you made. Include the reason: a blocked path, an overshadowed plant or a part of the year you would like to improve.
Update the sketch if you move plants. When you look again, compare the result with that intention. There is no need to record every visit; choose moments that tell you something useful.
Why? A record helps you make decisions from what happened in your own garden. Revising a plan is part of gardening, not evidence that the first plan failed.
Keep a border review with this place
Use the prompts that help, and add a photograph to compare with an earlier entry.
Edit the prompts and add a photo in the journal editor, then press Save. Opening a draft does not save it or change your border plan.
Return to the plan when it helps
Keep what you enjoy, investigate what is struggling and adjust the parts that no longer work for you.
Sources and further reading
- RHS: Creating and developing a border
- RHS: Growing perennials
- RHS: Establishment problems in trees and shrubs
- RHS: Reviewing an established border
- RHS: Moving trees and shrubs
- RHS: Dividing perennials
Sources checked 21 October 2026. Growth rates, seasonal appearance and suitable times for moving or dividing depend on the plant and its growing conditions.
Getting to know your garden · Put your ideas into practice
Your first border
Let’s bring what you have noticed into one small planting area of your own.
You don’t need a finished design or a long shopping list. We’ll begin with a place you know, explore a few plants and try an arrangement you can adapt as you learn.
If you followed the earlier guides, bring your observations and wishes with you. There is no need to start again. Choose the growing area below to keep this plan with that place, or give a new border a simple name.
Move between the sections whenever it helps. Unknown answers can stay blank, and you can change your ideas later. Your plan resumes where you left it.
Which place shall we work on?
Garden timeline
Observations, photographs and completed maintenance tasks. A plant filter shows observations linked directly to that plant.
Backup & restore
Download your saved garden, plant library, favourites, tasks, completion history, observations and journal photos. Unsaved edits and the application's bundled plant photos are not included.
Restore replaces this browser's saved garden. Close other app tabs first. Keep a current backup before restoring.
The backup contains your journal photos and personal notes. Keep it somewhere private. The readable journal HTML export cannot be restored here.
Seasonal tasks
Ideas for your garden, not a compulsory checklist. Review the conditions before adding a task. Suggested months can be adjusted; no deadline or repeat interval is added automatically.
Plant library maintenance
Optional collection updates and CSV import tools.
UK plant collection · Batch 1
50 additions towards a collection of around 1,000 new garden plants. Names, growing requirements and source references have been reviewed for this batch.
View the 50 plants and review notes · Plant photographs (47 / 50)
Import plants from CSV
Choose Plants_100_Enriched_EN.csv from this package to update the original 100 plants with field-level sources. The same plant IDs update existing records.
Comma-separated UTF-8 · up to 5 MB or 5,000 rows · preview before saving. Empty cells remain unknown. Existing verified records and individually verified fields are protected.
Import preview
| Botanical name | English name | Review status |
|---|